
Learning how to arrange your own flower bouquet is a skill I have found that comes in handy! Sometimes buying bouquets at a store can be like picking out a card for someone. When you can’t find the right one you are left feeling disappointed and end up buying a blank card to write your own message. Which really turns out for the best, because having something handmade always means more to the person receiving it.
Knowing how to arrange your own flower bouquet will be beneficial for a special gift or a meaningful way to bring a little beauty into the home.

Here are my “how-to” steps on arranging a beautiful flower bouquet.
Step 1: It starts with buying the right flowers
When you look at a pre-made bouquet at the stores you see more than just the flower. There are greens, small buds, and a variety of flowers that make up a dynamic eye-catching arrangement. When you set out to put your own bouquet together make sure you have these essentials for arranging a beautiful bouquet.
- The primary flower you want to have in your bouquet
- Foilage (an assortment of eucalyptus, seeded eucalyptus, ferns, bells of Ireland, lemon leaf)
- Filler flower (baby’s breath, snapdragon, poms, etc). This won’t be your primary showcase flower, but one that will be complementary to your primary flower.
- Small buds (roses, carnations, freesias)
You want to your bouquet to look full and luscious, so make sure to buy a decent quantity of each piece. Don’t skimp. This will also allow you to make mistakes while arranging and leave a margin for a few broken stems.
**Bonus Tip – While you are at the store study the pre-made bouquets to see how they arrange them. Notice how all the different pieces work together to make an arrangement.

Step 2: Layout all your materials
Layout all your materials to see what you are working with! Get a vase, scissors, and set aside a good 20 minutes to put together a beautiful flower arrangement.

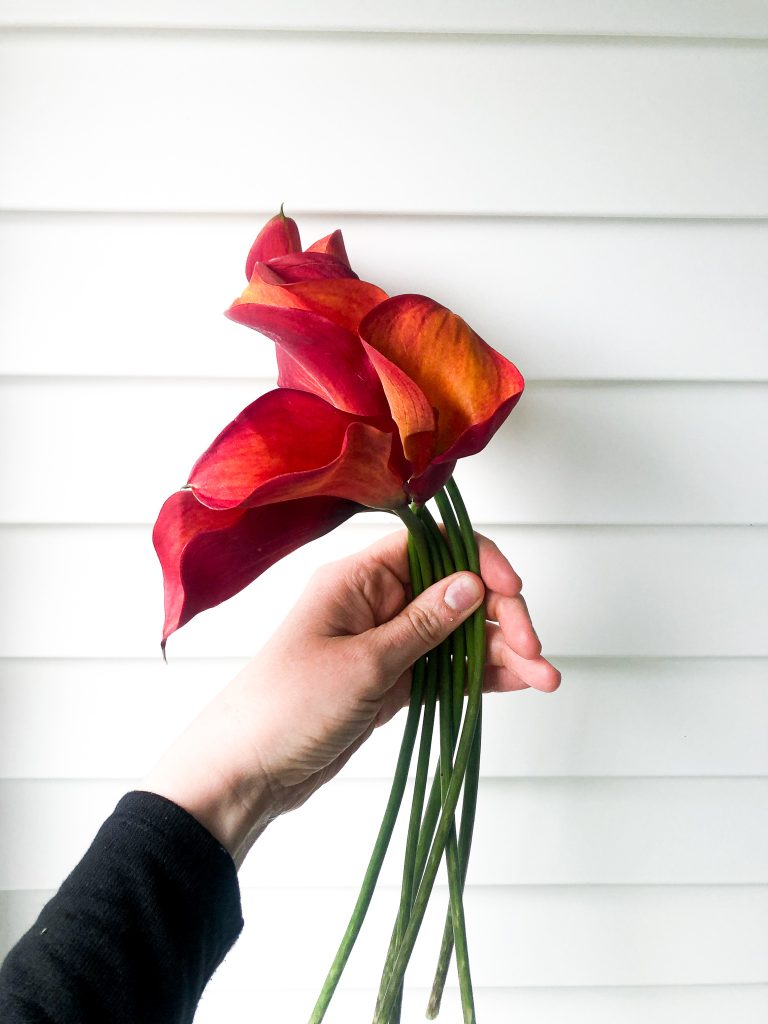
Step 3: Pick up one stem at a time and arrange them in your hand.
Taking one stem of your primary flower first, pick up one stem at a time and arrange them in your hand.
The arranging will take alot of playing around, but this is what makes it fun. If you have no idea what “playing” even means in this context are a few action steps:
- Twirl a stem in your finger.
- Notice what direction the flower opens, where the petals fall, and how the different colors look on the different sides of the petals.
- Vary the heights of each stem.
Adding one stem at a time until you like the way it looks. See pick below.
Step 4: Add filler flowers
After you have your primary flowers arranged the way you like them, keep holding them in that position and slowly add the fliller flowers stem by stem.
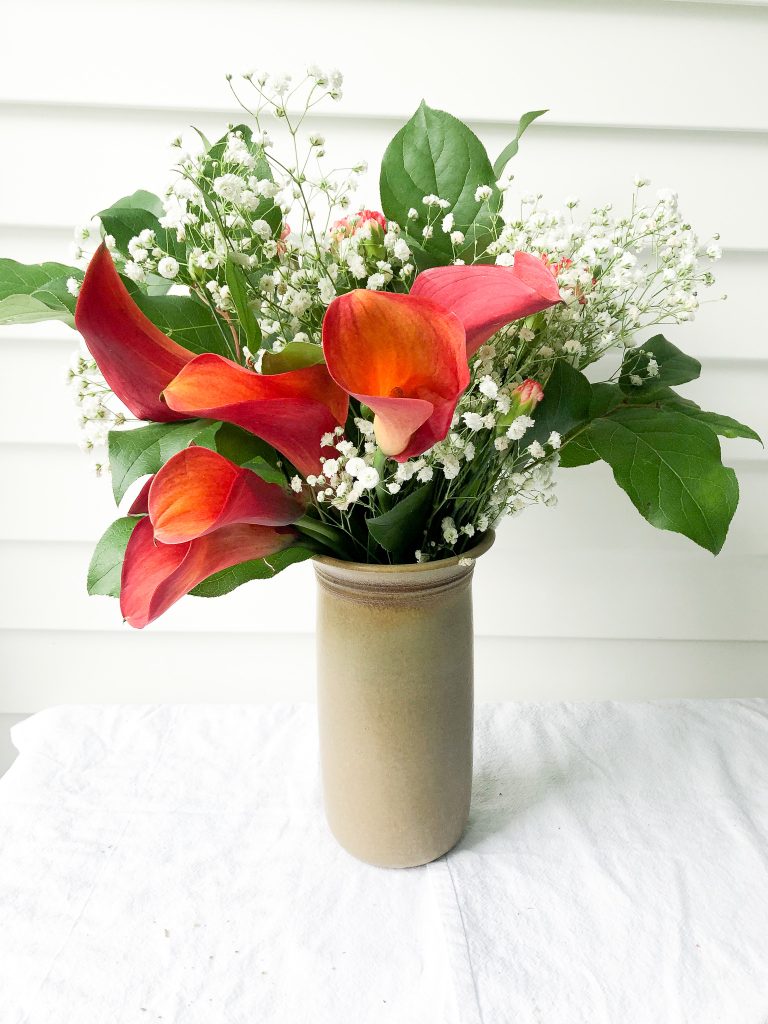
In the bouquet, I am making in these pictures I chose baby’s breath as my accent flower. The Calla Lilly flower is so pretty there wasn’t any other flower at the store I thought would complement it besides the delicate white of baby’s breath and foliage.

Step 5: Add foliage
Repeat the same process of playing with each stem until you like the way it looks. Here are some ideas on how to play with your foliage:
- Create a “backdrop” as it were. If your bouquet is going to be a display, with the primary flower front and center, a backdrop of green will help to make the color of the flower pop.
- Vary the heights. This will create more dimension.
- Surround your primary flower with floiage. If your bouquet is to have a wedding bouquet a symmetrical, round shape is what you are going to look for.

Step 6: Add buds
This was one of the pieces of a bouquet I never noticed until the florist for our wedding pointed it out to me. The buds and small pieces make the bouquet look more organic, natural, and bring another level of dimension to your bouquet that is hard to beat.
In the bouquet I am making, I used carnations. Carnations are inexpensive flowers, and they usually have lots of buds in a bunch when you buy them at a store.
Look at the buds and notice the different phases they are in. Some are just about to bloom, some are really “green” and are not yet close to budding. Both are great to cut off the stem and add them to the bouquet.

Add them to the middle of your bouquet, almost like you are inserting them into the bouquet to break up the visual lines you have created. Notice in the picture below where I have inserted them. They are in the midst of the greens and breaking up the visual lines I previously created.

Step 7: Cut them down to size
Up to this point, you have not cut the stems yet. You will want this to be the last step before putting them in the vase. As you arranging them, playing with the varying heights and lengths is an important part of the process. So leaving the cutting until the end so you have as much height to work with as you can.
Hold the flowers up to the vase and cut where you think you will want them to land on the neck of the vase. See pic below.

Step 8: Picking the right vase
This step is an important one not to miss. A vase can be make or break of a pretty flower bouquet!

All vases have different neck sizes so depending on how full your bouquet is, you may need to switch it up. For most bouquets, you will want a neck that is wide enough, but not too wide. When a neck is really wide it won’t hold your bouquet in place. Your flowers will fall out of the arrangement you just worked so hard to make. So pick the vase with the right neck size.
Secondly, the vase color or material is another important aspect of making a beautiful bouquet. In my opinion opaque vases are the way to go! Hear me out.
Opaque vases create a focused look. By hiding all the green stems you conceal the part of the bouquet that isn’t necessarily coordinated. The flowers at the top are what you have worked to arrange, but that doesn’t mean the stems are equally coordinated.
Also, when your bouquet has sat in the vase of water and flower food for a week the water starts looking gunky and moldy. Having an opaque vase hides this, and makes your display more enjoyable for a longer period of time.
Clear vases are pretty! Don’t get me wrong. If you have a very green heavy bouquet this can be a nice option.
Obviously this is a personal preference thing. But if you are looking to take your bouquets to the next level, I think this is a crucial tip!
When I started making this bouquet I initially thought the pink clear vase would be best. It did look nice, but here is an example of how the ceramic vase made all the colors pop!
In summary, here are the steps for how to arrange your own flower bouquet
- Step 1: It starts with buying the right flowers
- Step 2: Lay out your materials
- Step 3: pick up stem by stem and arrange them in your hand
- Step 4: Add filler flowers
- Step 5: Add foilage
- Step 6: Add buds
- Step 7: Cut them down to size
- Step 8: Pick the right vase!
Tips
If you went into this post understanding the general concept of how to arrange your own flower bouquet, here are some tips you may not have considered.
- Study pre-made bouquets at the store for inspiration. Take note of details in the colors, shapes, dimensions, etc.
- Pick out foliage that will enhance your bouquet.
- Vary heights, vary heights, vary heights!
- Create dimension
- Arrange before you cut
- Find the right vase size and material to make your bouquet pop.
Enjoy!
Arranging your own bouquet is so rewarding! It is a special gift to give to a loved one or a special treat for yourself.
Have you arranged your own bouquets before? What tips have you learned along the way?
Answer in the comments below! Would love to hear what you know!
Want more decorating or more DIY inspiration?
Check out the home page right sidebar to subscribe to be the first to get inspiration and more how-to’s right to your inbox.
Leave a Reply